Showing posts with label Leah Day. Show all posts

Friday, August 26, 2022

Tea and Cakes

 Dear Readers, 

Last year when I went to Quiltville Inn on a quilter's retreat with some of my favorite quilters, Patti and I took an afternoon and drove to a neighboring town and went fabric shopping.  Patti and I both bought Tula Pink bundles and a pattern called Lucky Stars by Atkinson.  I had wanted to use that pattern to make a quilt using her Curiouser and curiouser line of fabrics.  This line of fabrics is based on the story of Alice and Wonderland.  I decided to make the quilt in the Lap size which is 60 x 75.   Meanwhile sometime during the school year, Celeste was home and her dear friend came over and she picked some fabrics for a quilt.  I did not show her the curiouser and curiouser line as it was sitting on the washing machine as I am an avid pre washer.  Any way I realized a lot of the fabrics she picked were very similar colors to the line.  

So I made Lafadra's quilt using the curiouser fabric, taking out the queen of hearts fabric and the Alice fabric and subbing in some of the tiny beast line, that I also loved.  I used the fabrics Lafadra picked for the back and I think both came out cute.  Hope she loves it.  

I had a lot of fun practicing my freemotion on the long-arm.  It is certainly a different skill than on my sit down machine.  I was using books by Angela Walters and Leah Day for most of the inspiration but I used a few others too.  

I thought I would post close ups of the individual blocks, so you could see what I was doing.  On each block I did something different on each white section, a different pattern on the strips surrounding it and then something on the center block.


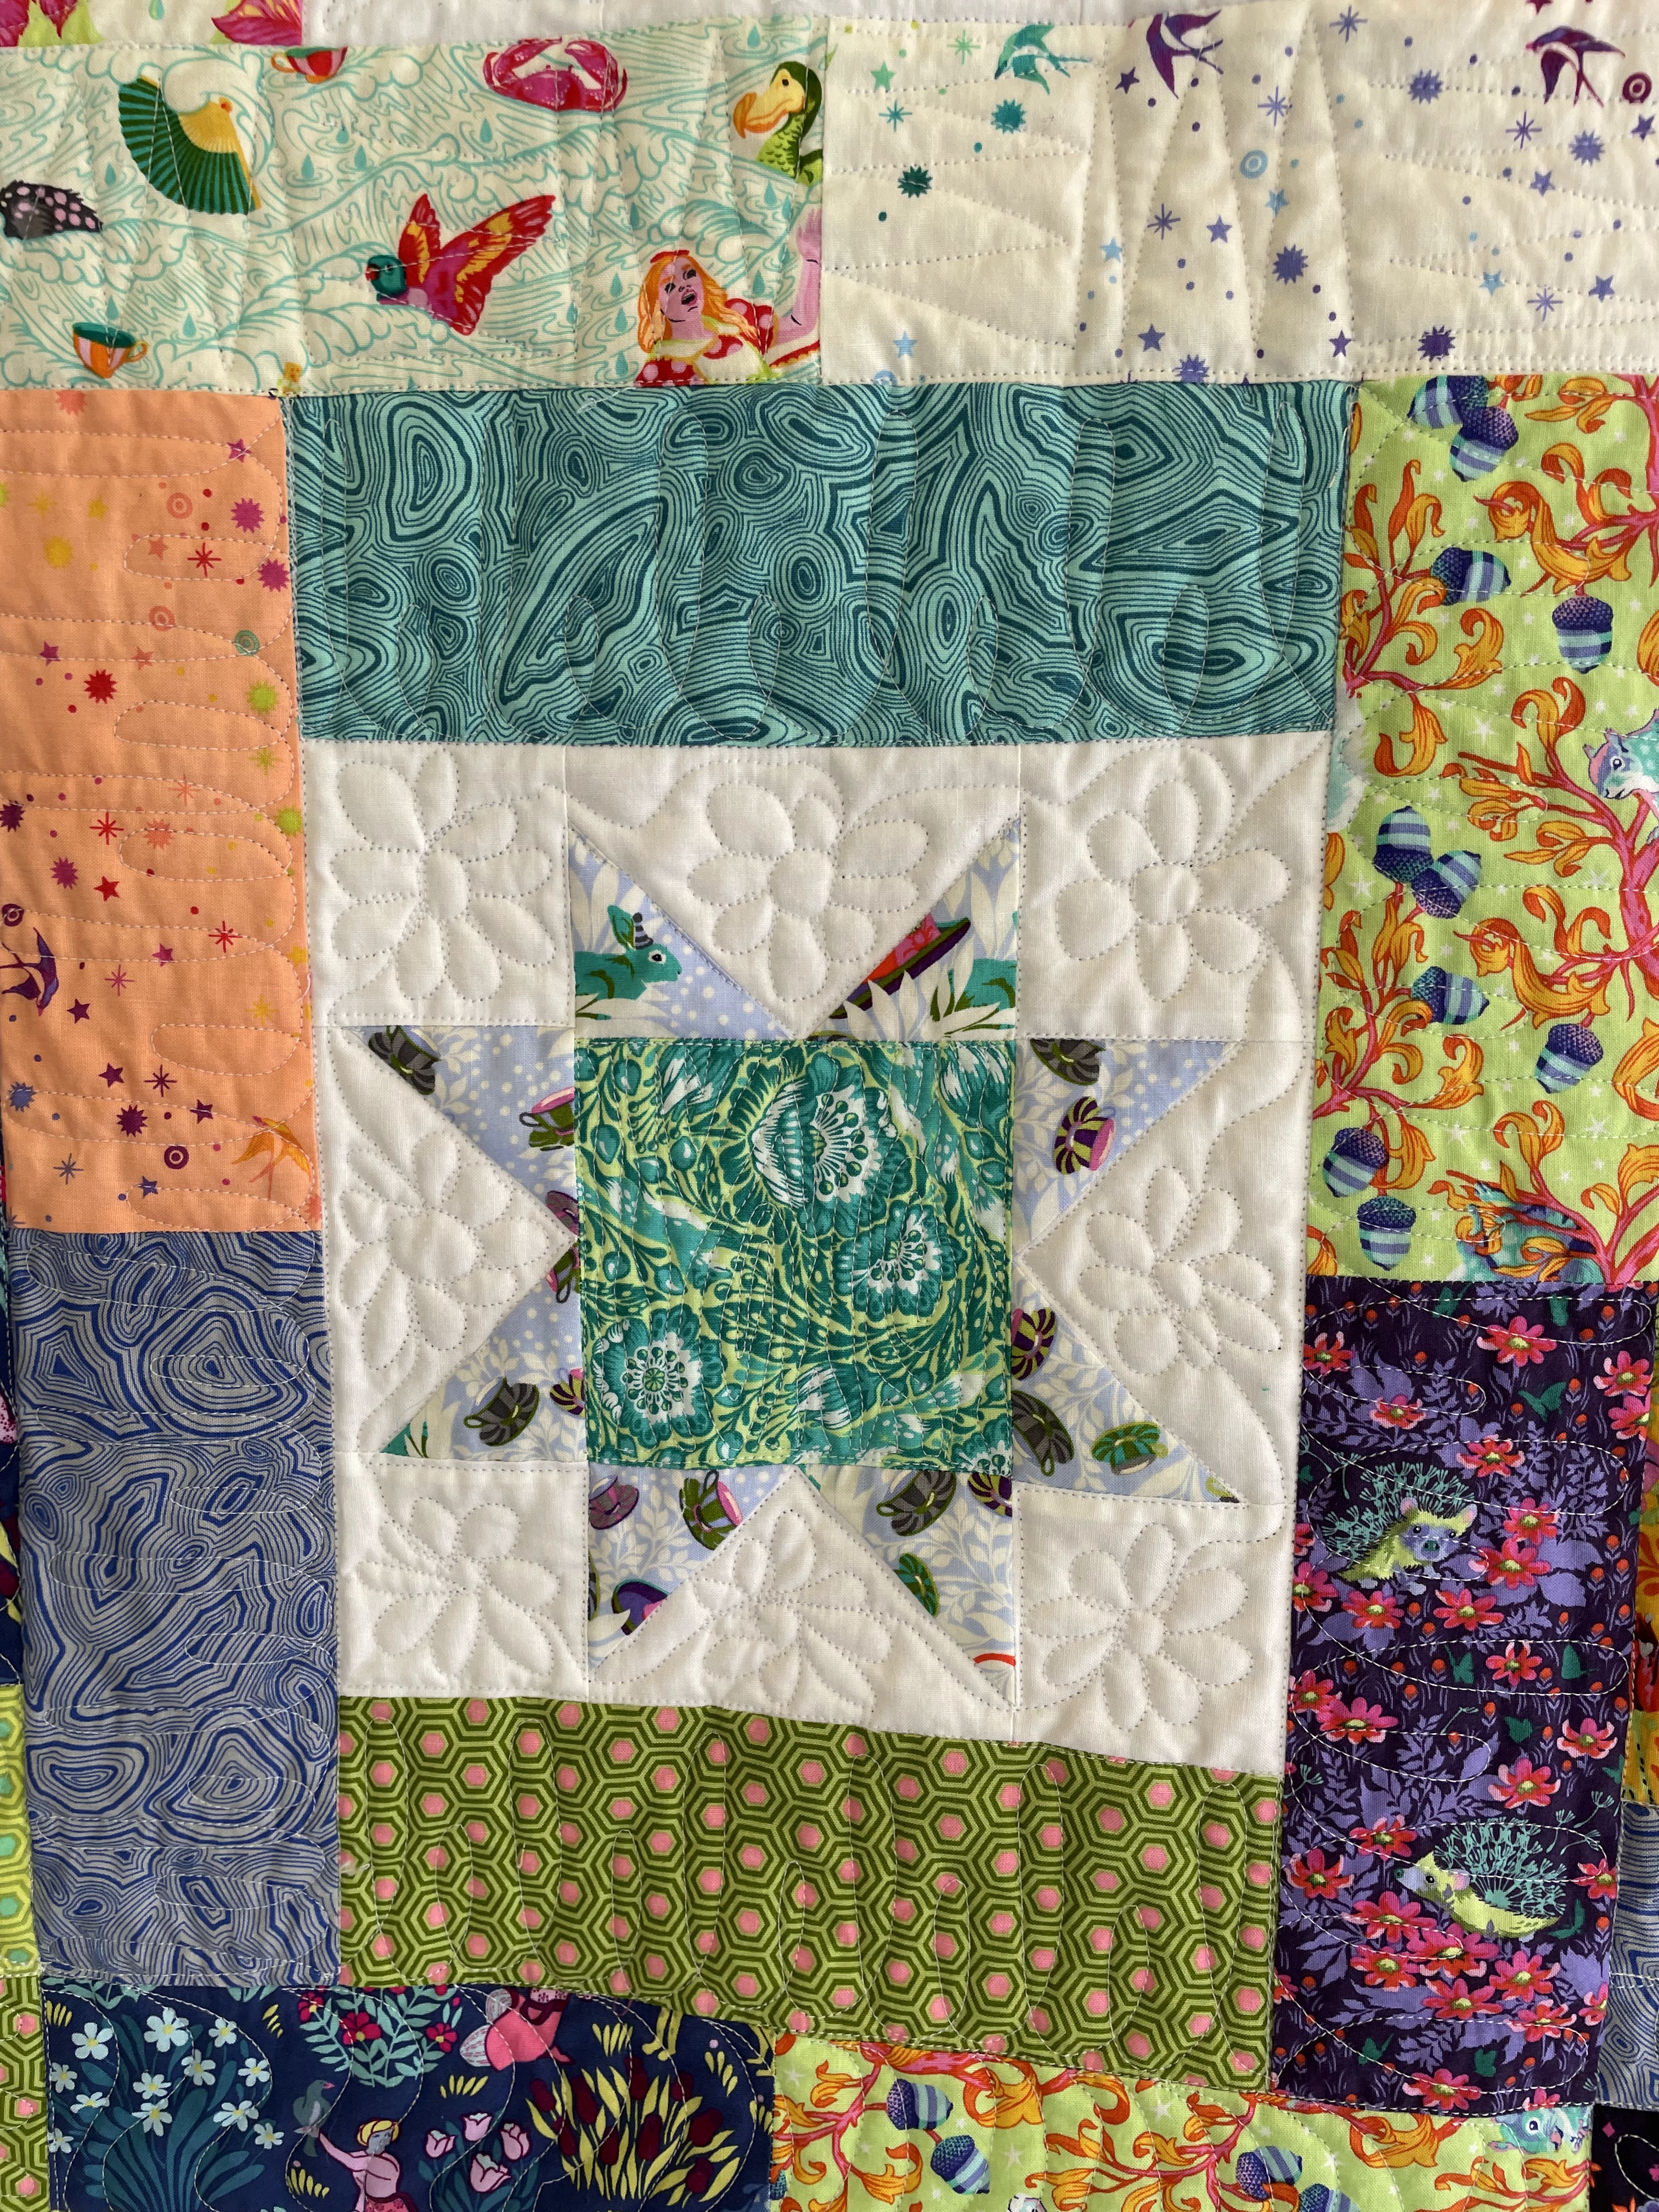


I learned a lot, and definitely need more practice on several of the patterns but overall, I am so happy with how it came out.  

UPDATE:  


She seemed pleased!!  

Sew on,

Terry

Sunday, March 25, 2018

Pinmoor

Hey all,

I decided to take the plunge.  I took on some commission T-shirt quilts.  Celeste's boss wanted 4 quilts done, so I am working on them.  I have had to sideline my own sewing, which makes me a little sad, but not too much because I am doing these quilts and I hope they will love them.

I was watching a Leah Day video on you tube the other day and she was using a gadget called Pinmoor to baste a quilt. This would be for those of us who still quilt on domestic sewing machines.  I was planning to order her book on machine quilting, so I went ahead and ordered 2 packages of Pinmoors.   Let me tell you, that is the best thing since sliced bread.  If you used to baste your quilts with safety pins this is definitely an upgrade.  It took me half as long to baste one of the T-shirt quilts and no sore fingers!!!  They were invented by a quilter named Loretta Ivison.  I think they would have lots of uses in crafting.  Here is a link to her website where you can order directly from her.  Leah Day carries them also in her store.  They are a better buy in Loretta's link.

You can see my basting with my new gadget here.  To baste it, I put a slight bend in the pin, so that when it poked out of the quilt, I could push is Pinmoor on the pin.

I knew that when pulling them out, I would not want to put them back in the ziplock bag they came in.  So I ran down to Freds (we no longer have a Wal-mart) and got the two smallest storage boxes they had.  My plan is to throw the bent pins in one and the Pinmoor in the other.


I will be working on quilting this T-shirt quilt this week, but I have two tennis matches, so I will not be able to get a whole lot done.  Pray for me, I am playing singles in one of them.  For now the masters program is on hold...hope I can work that out!


Sew on,

Terry

Monday, January 15, 2018

Stars over Winona

Dear Readers,

Another quilt I finished last fall was my Cookie Cutter Stars quilt that Barbara Cline designed for the Mississippi Quilting Association.  I had decided that I was going to make it using material that I had on hand.  In addition, I have wanted a quilted wall hanging for my classroom for a while, so of course I wanted it in school colors.  Red and white are the official colors but, we also use grey and black.  So I chose to do it in a variety of reds, black and white.


So each summer MQA hosts a nationally known teacher.  Last July it was Barbara Cline from Virginia.   She is the sister of one of my local guild members Julia Graber.  She has written a number of books, I have 3 of them I think.  You can go to her shop here.  Anyway she developed a new pattern that was only available to MQA members to teach.  She has it in her shop now.  It is called Cookie Cutter.

I learned several new techniques, which is wonderful!

Barbara has a way of inserting a fabric into a piece of fabric and she outlines that technique in her newest book.  Anyway, she taught us that technique and others too.  The two sided fabric twist at the corners was another technique that was new to me.

My tiger paws meander

I quilted this using a graffiti quilting technique I had been seeing quilting teachers like Angela Walters do on youtube.  I had also watched videos by Karlee Porter.  The other inspiration came from a book I have had for a while by Laura Lee Fritz.  I created my own design of for the top right corner and bottom left corner of tiger paws, since we are the Winona Tigers.  In the top left I quilted symbols for all the different subjects and activities I could think of.  In the bottom right I did words that I think of when I think of our school.  Around the edge I quilted words.  I did echo quilting on the stars and stipple quilting on the red background areas.


This quilt is 38 x 38 and is hanging in my classroom.  I put fabric with numbers on the back as I teach high school math.  No one will ever see it since it is a wall hanging, but I know it is there.

Have fun with your quilting from start to finish.  Thank you Barbara!!

Sew on,

Terry


Friday, December 23, 2016

Guild Challenge

Hey all,

It is almost Christmas!!  I am excited because today my son arrives and tomorrow my daughter arrives.  We are so excited.  Have a good bit on the 'to do' list, but wanted to write this post so I would be up to date on what I have been working on.

I have finished the Black and White plus one guild challenge from Mountain Quiltfest.  The challenge is to create a quilt with a perimeter less than 160 inches that is comprised of only black and white fabrics and one other fabric, I think I remember that the other fabric had to read as a solid.
Matt and Taylor's baby quilt 60 x 60
I really liked the quilt that I did for Matt and Taylor's baby and had enough of that fabric to make another, only revised to be smaller.  Their quilt was about 60 inches square and this quilt needed to be
a max of 40 on each side.  So I revised how I made the stars, shrunk the sashing and border....I was also not in love with the center square on Matt and Taylor's quilt.  So I was talking to Will, my son, on the phone and asked what he thought.  We were tossing ideas back and forth and he said something about a setting sun, and that made me think of the moon over a mountain block.
Shadows of Kilimanjaro 37 x 37
I took a free motion quilting class on craftsy.com by Leah Day, so I decided to do various quilting designs in each of the orange blocks.  I was thinking, pick ones that are organic looking, that would remind people of nature.

I did bamboo on this one.
A vine with long fronds.


 A lotus looking pod.

 Pebbles.
 Flowing water.
Flowers.
Curly vines.
 I also quilted each of the animal blocks and the mountain and the sun.  I decided not to quilt the white areas, so I just need to put on a label and a hanging sleeve.

I hope each of you has an amazing Christmas and remembers that we celebrate this season because Christ died on the cross for our sins and this gift that God gave us is the ultimate gift of salvation and it is worth celebrating the birth of the Christ child.

Merry Christmas.

Terry


Sunday, January 24, 2016

Two small finishes! (Almost)

Dear Readers,

I had two small finishes this week...well they are all finished except writing out the label.

I finished another one of the small tops that I was practicing a quilting technique I saw on the craftsy class by Jacquie Gering.  Still need a name for this one.


I used the Bernina to do a serpentine stitch in horizontal rows.

The second finish was my MQA challenge.  I had already cut a bunch of tumblers in various sizes to do Bonnie Hunter's leader ender for this year.  So I used them and made my 25 by 25 inch quilt to meet that challenge.  I have also been taking the Leah Day free motion class from Craftsy so I did a different free motion quilting design on each of the neutral tumblers.  I believe I am going to call this "Thimbles".


Working on binding the antique top and quilting the scrappy mountains.  I decided to quilt it to kind of look like a topographical map.  So that meant walking foot work across the quilt.  I am having some issues with rippling...maybe the tension is too much on the presser foot. Not sure.  Maybe a good pressing when done will take care of it. We will see.

Got to get ready for Sunday School now.

Sew you later.

Terry


Tuesday, January 5, 2016

Sewing table minor upgrade

Dear Readers,

I have finally finished all the parts to the Winter Bonnie Hunter Mystery, but I don't have any blocks put together yet.

I have also just completed a minor improvement to my sewing table.  I have had problems when sewing a bigger item like drapes that it catches other tools on the table and pushes them over the edge.  In addition, I have been taking an online class by Leah Day on Craftsy on free motion quilting on your home machine.  She was saying your sewing table should be up against a wall to keep the quilt from falling off the edge of the table and jerking on the needle.

I have just finished setting up my sewing room this summer, and did not want to rearrange, so I came up with an idea to stop that without moving my furniture around.

I bought a 1 x 10 board and made a small "wall" for the table.  I drilled a hole in the center of the board about an inch and a half from the edge and through the lip of the formica table, put a bolt and wing nut through.  Then I leveled the board and drilled a hole on each end and put bolts through those holes.  Then I took the board off, using the same center hole put the board on with the larger part up.  then I drilled two more holes for securing the board when in that position.  This forms the "wall" when free motion quilting.


Sew long,

Terry